
Build Your First Route
A short first-route walkthrough for new Fouffy Dog Routing users.
This is the best place to start if you want to turn customer appointments into a route you can actually drive.
Before you start
You need at least one customer with a validated address, or a spreadsheet you want to import.
If your business usually starts from the same place, add a dispatch location first. This could be your office, grooming salon, home office, shop, or warehouse.
1. Add or import customers
You can add customers one at a time from Manage > Customers.
If you already have a spreadsheet, use Manage > Imports. Importing is usually faster when you have a list of appointments or customers.
2. Create a route
Use Quick Route if you want to try the route before saving it.
Use a saved route if you already know you want to keep it, assign it to a driver, or reuse it later.
3. Add stops
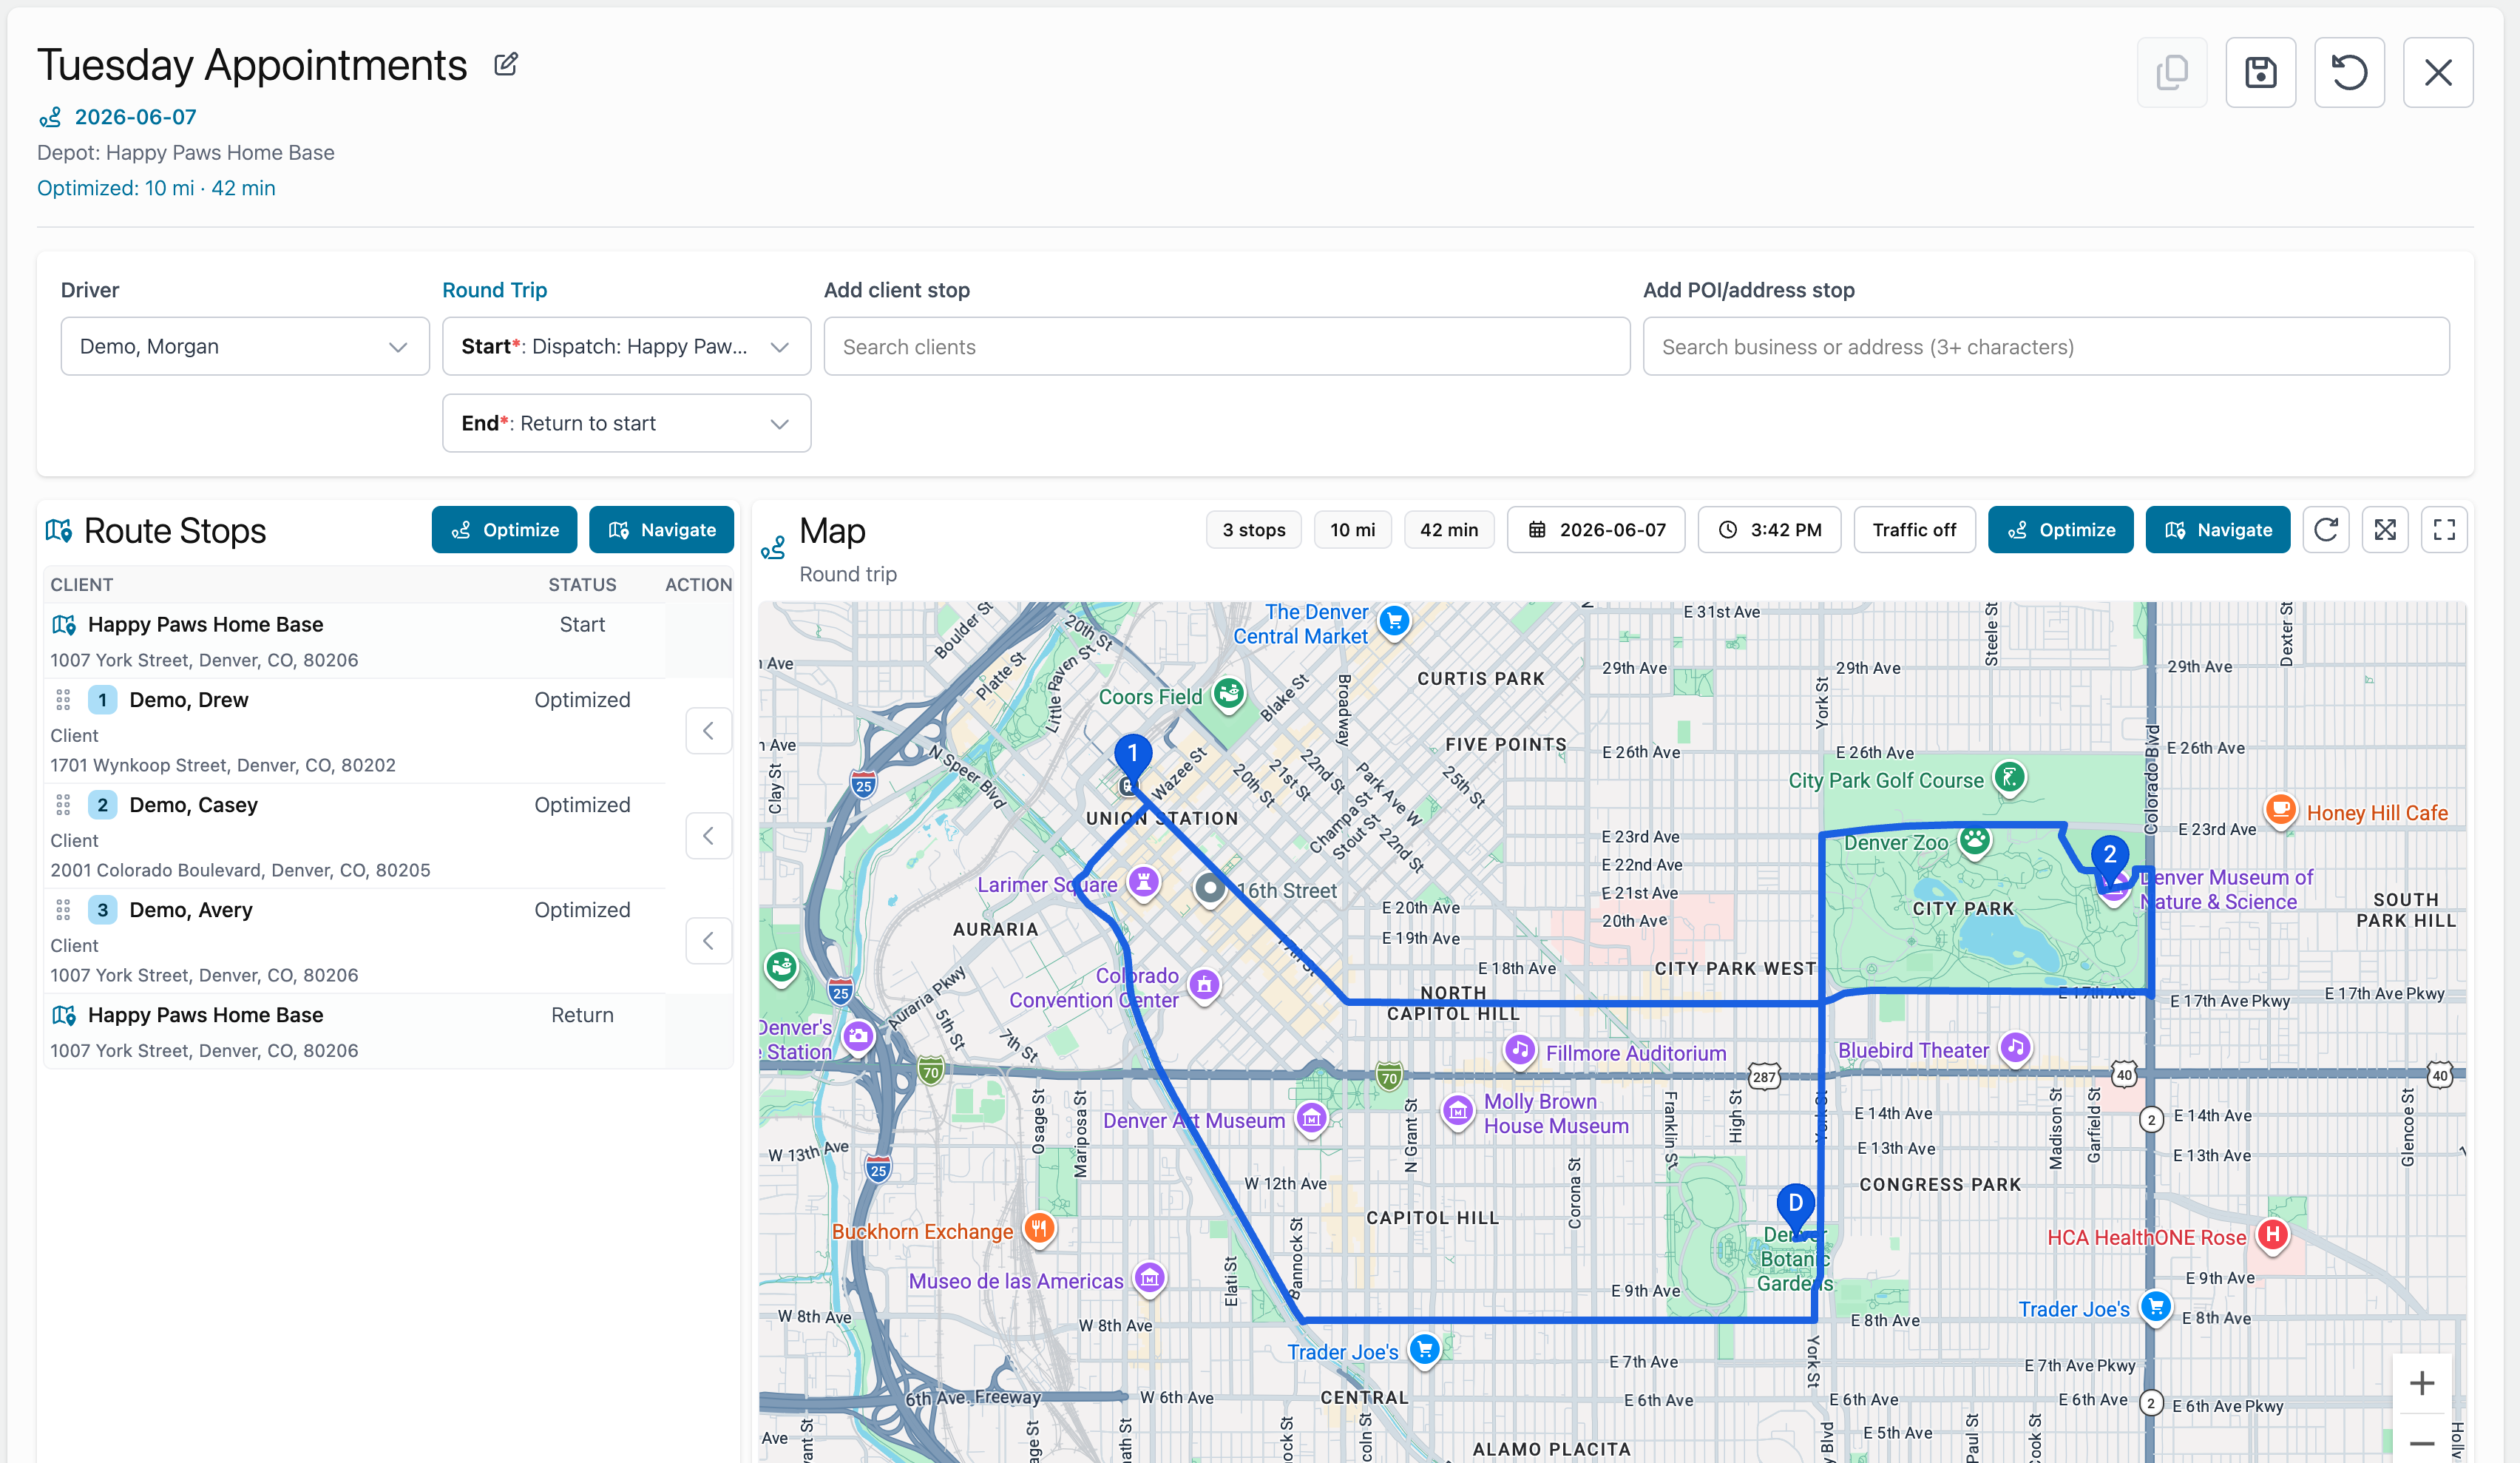
On the route screen, search for a customer and select the result to add it as a stop.
You can also search for a POI if you need to add a saved place or business location.
4. Optimize the route
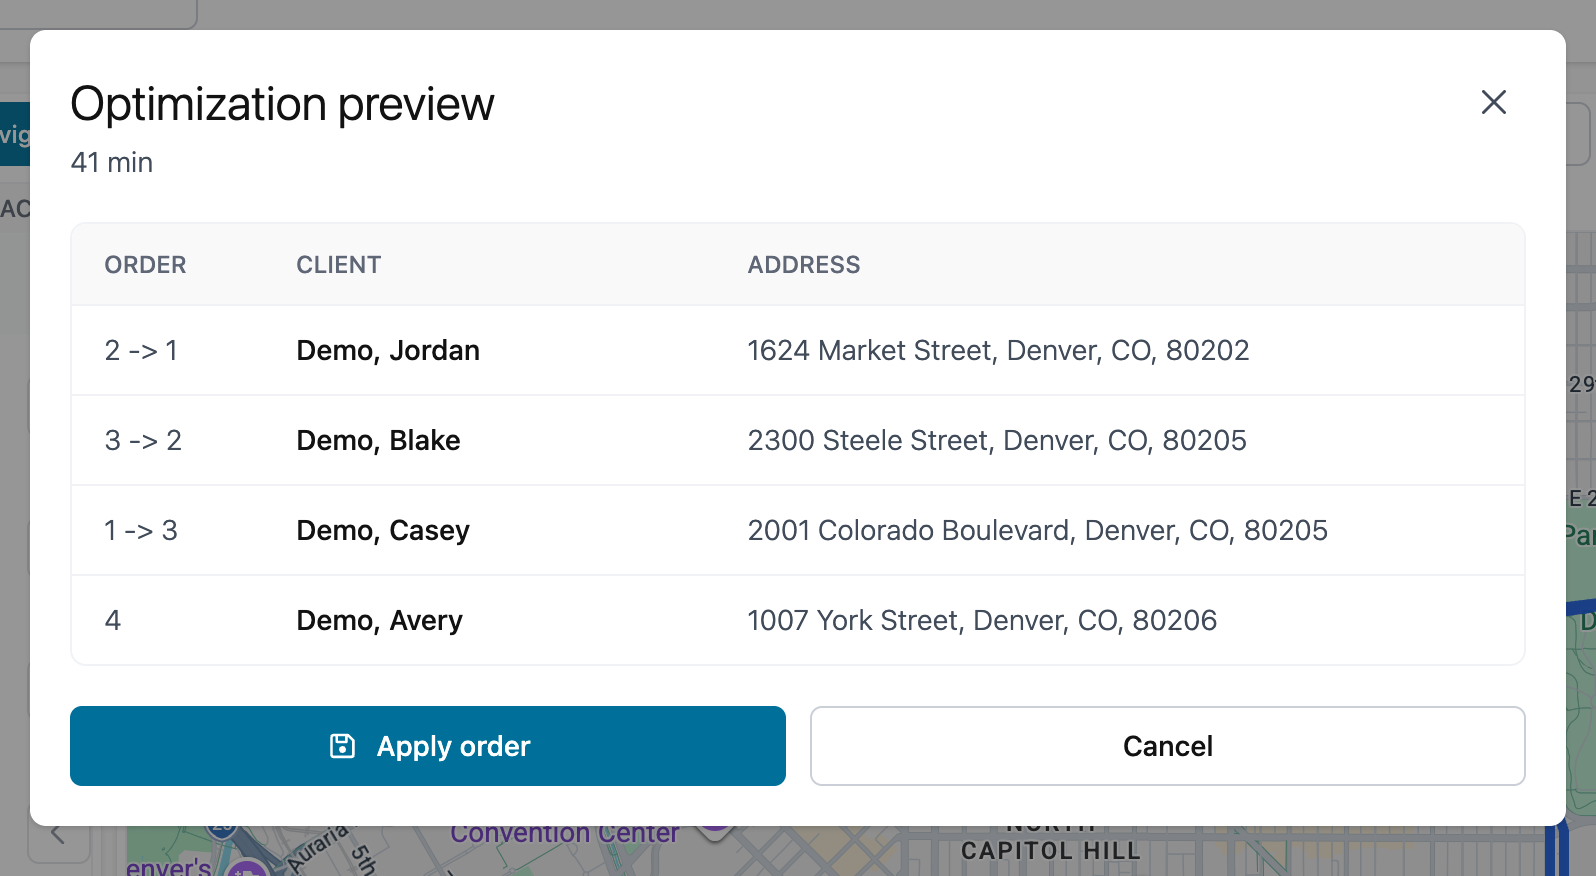
Choose Optimize when you want Fouffy Dog Routing to suggest a better stop order.
Review the new order before saving. If you prefer your own order, you can drag stops into place.
5. Review the route
Check:
- Driver
- Start point
- End point
- Stop order
- Map route
- Estimated drive time
- Any unsaved changes
6. Open navigation
Choose Navigate when the route is ready to open in Google Maps.
Google Maps will open with the route locations so the driver can begin navigation.
7. Save the route
Choose Save Route when you want to keep the route.
For Quick Routes, saving turns the plan into a saved route you can find again later.